
If there is one training zone that separates cyclists who keep improving year after year from those who plateau, it is Zone 2. Not intervals. Not threshold work. Zone 2 — the pace that feels almost embarrassingly easy — is the foundation that everything else is built on.
This post explains what Zone 2 actually is, what it does to your body, how much you need, and what happens when you get the balance wrong.
What is Zone 2 training?
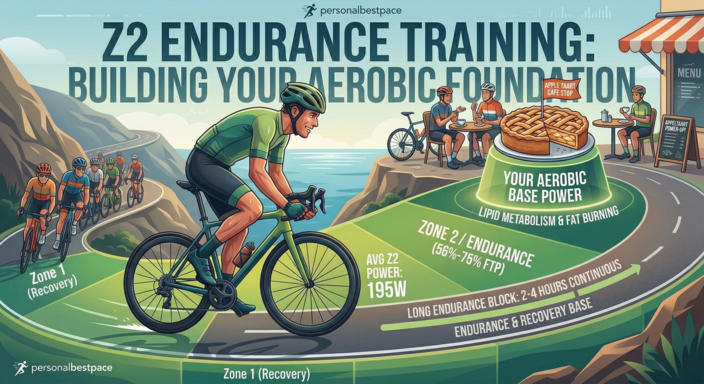
Zone 2 is the second of five training zones, sitting just above easy recovery spinning and well below the effort level where you start to feel your legs burn. In power terms, Zone 2 sits roughly between 56% and 75% of your FTP. In heart rate terms, most cyclists are in Zone 2 somewhere between 65% and 75% of max heart rate.
The defining characteristic of Zone 2 is that you can sustain it for a very long time — 60 minutes, 90 minutes, 3 hours — without significant fatigue accumulating. You should be able to hold a conversation. Your breathing should be elevated but relaxed. You are working, but not suffering.
What Zone 2 actually does to your body
Zone 2 training primarily stresses your aerobic energy system — specifically, it trains your body to produce energy from fat rather than carbohydrate. This sounds like a weight loss thing but it is actually a performance thing. The better you become at oxidising fat at moderate intensities, the more carbohydrate you spare for when you actually need it — on climbs, in attacks, at the finish.
The specific adaptations from consistent Zone 2 work include increased mitochondrial density (more energy-producing machinery inside your muscle cells), improved capillary density (more blood flow to working muscles), enhanced fat oxidation capacity, improved cardiac stroke volume (your heart pumps more blood per beat), and a lower lactate production at any given power output.
None of these adaptations happen quickly. They accumulate over months and years. This is why Zone 2 is not exciting — the payoff is slow. But it is also why athletes who do consistent Zone 2 work tend to outperform those who skip it in favour of harder sessions.
How much Zone 2 do you need?
Research and coaching practice consistently point toward roughly 80% of total training volume at Zone 2 or below for trained endurance athletes. This is the polarized model — 80% easy, 20% hard — and it consistently outperforms approaches that do most of their riding at medium intensities.
For an average cyclist training 8 hours per week, that means around 6.5 hours per week should be genuinely easy Zone 2 work. Most cyclists, if they are honest, spend far too much of their riding time in the “moderate” zone — harder than Zone 2 but not hard enough to produce Zone 4 or 5 adaptations. This is sometimes called the “grey zone” and it is where many training plans go wrong.
For the average cyclist
If you are riding 4 to 8 hours per week and your goal is to get fitter and faster over a full season, Zone 2 should make up the majority of your riding. The most common mistake average cyclists make is riding their Zone 2 days too hard — they turn what should be a 90-minute endurance ride into a moderate tempo effort, which accumulates fatigue without producing the specific aerobic adaptations they are looking for.
The rule is simple: if you cannot sustain the effort for the full duration without slowing down, you are going too hard. Zone 2 should feel uncomfortably easy for the first 30 minutes. By the end of a 2-hour ride, it should feel like genuine work — but it should never feel like suffering.
For the advanced cyclist
More experienced riders often make the opposite mistake — they dismiss Zone 2 as “junk miles” and fill their schedule with intervals. This works for a while. But without a large aerobic base, the ceiling on how much high-intensity work you can absorb is low. Zone 2 is what expands that ceiling. Elite endurance athletes typically do more Zone 2 work in absolute terms than amateur cyclists, not less.
For advanced riders, the specific target is to improve your maximum power output at a lactate threshold of 2 mmol/L — the power you can sustain in Zone 2 before lactate starts to accumulate. Pushing that number higher over a season is a strong predictor of endurance performance.
What happens if you do too much
Zone 2 is the safest training zone to overdo — it does not produce acute fatigue the way threshold or VO2max work does. But too much total volume will still accumulate as chronic fatigue, expressed as a rising ATL that outpaces your CTL. Signs that your Zone 2 volume is too high include persistent heavy legs, declining power at the same heart rate, poor sleep, and declining motivation.
The fix is simple: reduce total volume for a week, ensure recovery rides are genuinely easy, and let your TSB recover to positive territory before resuming full training.
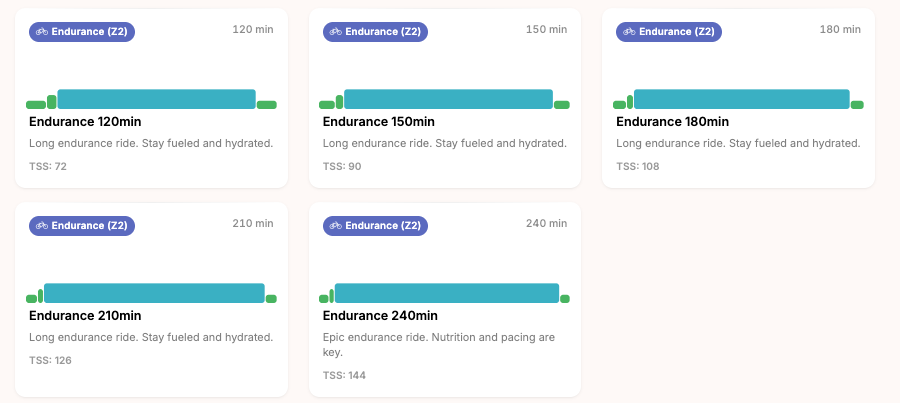
Zone 2 workouts in PersonalBestPace
PersonalBestPace includes Zone 2 Endurance workouts from 60 minutes to 240 minutes, structured around a steady aerobic pace to build your aerobic base. The AI coach tracks your CTL and ATL over time and schedules the right amount of Zone 2 work each week based on your current fitness and fatigue levels — so you are never guessing whether Tuesday should be an endurance day or a rest day.
Try it free at app.personalbestpace.com
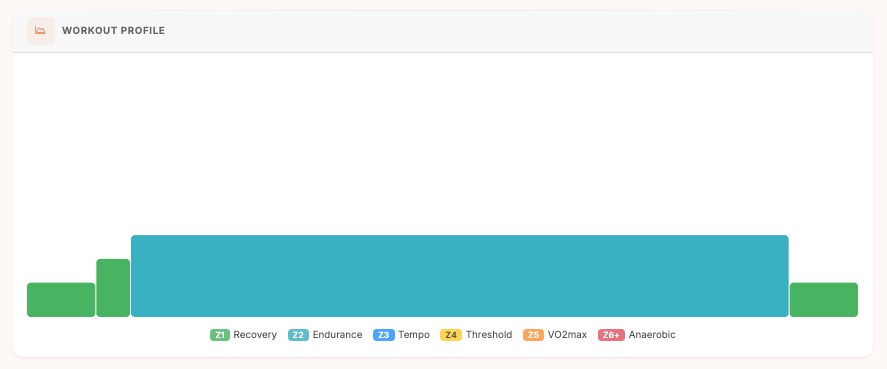
Endurance 90min — workout breakdown
Here is the full segment breakdown for the Endurance 90min workout from PersonalBestPace, showing exactly what you do at each phase — power as a percentage of FTP, target cadence, and segment type.
| Time | Duration | Power (% FTP) | Heart Rate | Cadence | Type |
|---|---|---|---|---|---|
| 0:00 | 5 min | 0–55% | ~60–65% max | Free | Warmup |
| 5:00 | 5 min | 28–65% | 65–72% max | Free | Ramp up |
| 10:00 | 70 min | 56–75% | 65–75% max | 85–95 rpm | Main — steady Zone 2 |
| 80:00 | 10 min | 0–55% | ~60% max | Free | Cooldown |
The 70-minute main block is the heart of this session. Keep your power in the 56–75% FTP range throughout — if you drift above 75%, you are moving into tempo territory and accumulating more fatigue than the session is designed to produce. Heart rate should settle and stay steady for the majority of the main block. If it keeps climbing over time at the same power output, it is a sign of dehydration or accumulated fatigue from previous days.